


1. 导入相关依赖
        <!-- swagger -->
        <dependency>
            <groupId>io.springfox</groupId>
            <artifactId>springfox-swagger2</artifactId>
            <version>2.9.2</version>
        </dependency>
        <dependency>
            <groupId>io.springfox</groupId>
            <artifactId>springfox-swagger-ui</artifactId>
            <version>2.9.2</version>
        </dependency>
2. 配置SawggerConfig类
@Configuration
@EnableSwagger2     //开启swagger2
public class SwaggerConfig {

}
3. 配置Sawgger的bean实例Docket
package cn.hm1006.springbootstudy.config;

import org.springframework.context.annotation.Bean;
import org.springframework.context.annotation.Configuration;
import springfox.documentation.service.ApiInfo;
import springfox.documentation.service.Contact;
import springfox.documentation.spi.DocumentationType;
import springfox.documentation.spring.web.plugins.Docket;
import springfox.documentation.swagger2.annotations.EnableSwagger2;

import java.util.ArrayList;

@Configuration
@EnableSwagger2     //开启swagger2
public class SwaggerConfig {

    //配置Sawgger的bean实例Docket
    @Bean
    public Docket docket(){
        return new Docket(DocumentationType.SWAGGER_2).apiInfo(apiInfo());
    }
    //配置Sawgger的个人基本信息  apiInfo
    @Bean
    public ApiInfo apiInfo(){
        Contact contact = new Contact("刘先森", "https://hm1006.cn/", "331186059@qq.com");
        return new ApiInfo("刘先森",
                "刘先森的第一个swagger",
                "1.0",
                "https://www.hm1006.cn/",
                contact,
                "Apache 2.0",
                "http://www.apache.org/licenses/LICENSE-2.0",
                new ArrayList());
    }
}
4. Swagger配置扫描接口
Docket.select()
    //配置Sawgger的bean实例Docket
    @Bean
    public Docket docket(){
        return new Docket(DocumentationType.SWAGGER_2)
                .apiInfo(apiInfo())
                .enable(false)//关闭swagger
                .select()
                //RequestHandlerSelectors配置要扫描接口的方式
                //basePackage():指定扫描包
                //any():都扫描
                //none():不扫描
                //withClassAnnotation():扫描类上的注解     参数是一个注解的反射对象
                //withMethodAnnotation():扫描方法上的注解
                .apis(RequestHandlerSelectors.basePackage("cn.hm1006.springbootstudy.controller"))
//                .paths(PathSelectors.ant("/cn/hm1006/springbootstudy"))//排除要扫描的包
                .build();
    }
5. 配置Swagger在生产环境中使用,在发布的时候不使用?
- 判断是不是生产环境flag = false
- 注入enable (flag)
    //配置Sawgger的bean实例Docket
    @Bean
    public Docket docket(Environment environment){
        //设置启用Sawgger环境,dev生产环境启用
        Profiles files = Profiles.of("dev", "test");
        //通过environment.acceptsProfiles(files);判断是否属于设定环境
        boolean flag = environment.acceptsProfiles(files);
        return new Docket(DocumentationType.SWAGGER_2)
                .apiInfo(apiInfo())
                .enable(flag)//关闭swagger
                .select()
                //RequestHandlerSelectors配置要扫描接口的方式
                //basePackage():指定扫描包
                //any():都扫描
                //none():不扫描
                //withClassAnnotation():扫描类上的注解     参数是一个注解的反射对象
                //withMethodAnnotation():扫描方法上的注解
                .apis(RequestHandlerSelectors.basePackage("cn.hm1006.springbootstudy.controller"))
//                .paths(PathSelectors.ant("/cn/hm1006/springbootstudy"))//排除要扫描的包
                .build();
    }
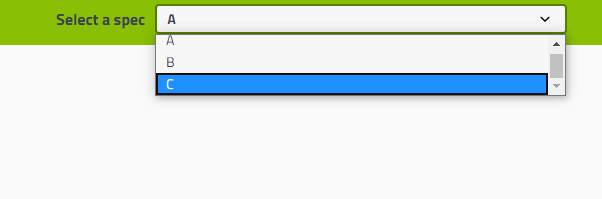
6. 配置Swagger分组
Docket.groupName("刘先森")
- 如何配置多个分组;多个Docket实例即可
    @Bean
    public Docket docket1(Environment environment) {
        return new Docket(DocumentationType.SWAGGER_2)
                .groupName("A");
    }
    @Bean
    public Docket docket2(Environment environment) {
        return new Docket(DocumentationType.SWAGGER_2)
                .groupName("B");
    }
    @Bean
    public Docket docket3(Environment environment) {
        return new Docket(DocumentationType.SWAGGER_2)
                .groupName("C");
    }
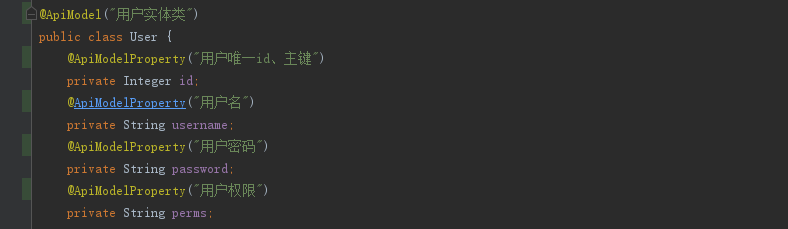
7.注释配置
实体类配置
@ApiModel("用户实体类")
@ApiModelProperty("用户唯一id、主键")
Q.E.D.